이전 포스팅에서 Parallel Cluster에 대해서 소개를 하였습니다.
이번 글 에서는 AWS Parallel Cluster를 생성해 보도록 하겠습니다.
AWS Parallel Cluster 생성을 하기위해서는 몇 가지 준비가 필요합니다.
AWS Parallel Cluster 구성 환경
– Amazon Linux 2023
– Python 3.9 (+ pip3)
– NodeJS
– AWS CLI v2
AWS ParallelCluster (with Slurm)동작 과정은 아래와 같습니다.
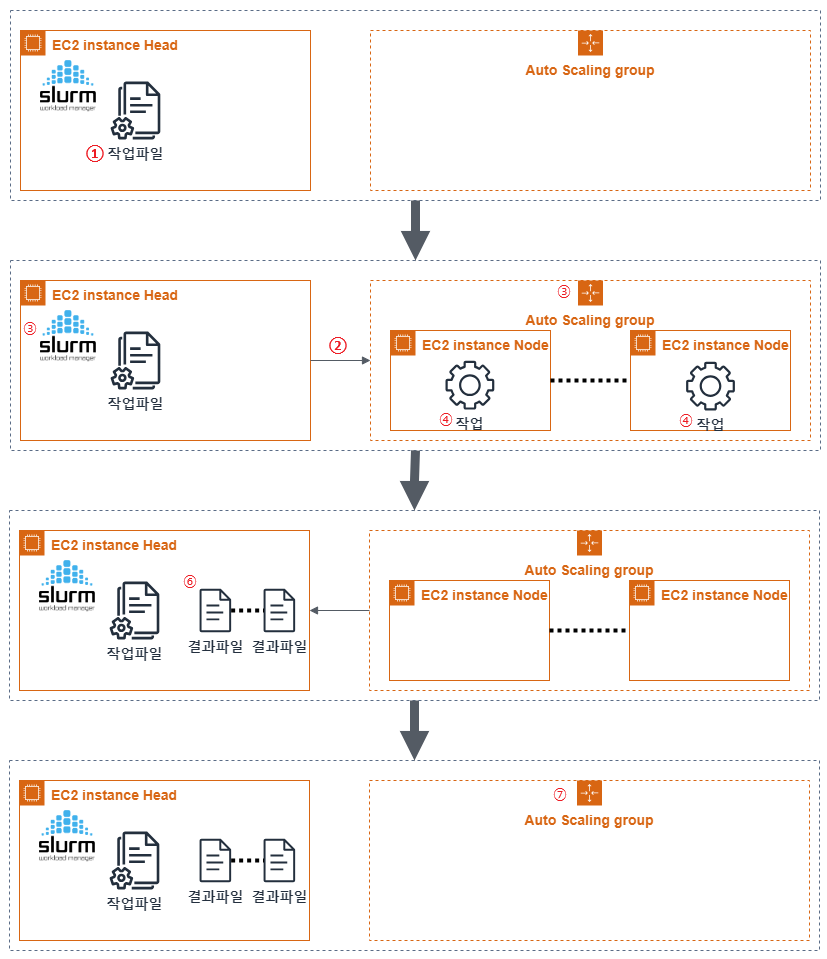
1. Head 노드에서 작업 정의
2. 정의한 작업 수행
3. 작업 대기 열 등록 및 컴퓨팅 자원 확인
4. 작업 수행
5. 작업 상태 모니터링
6. 작업 완료 및 결과 저장
7. 수행 작업 자원 제거
AWS ParallelCluster 동작과정이 이해가 되었다면 이제 AWS ParallelCluster를 구축해 보도록 하겠습니다.
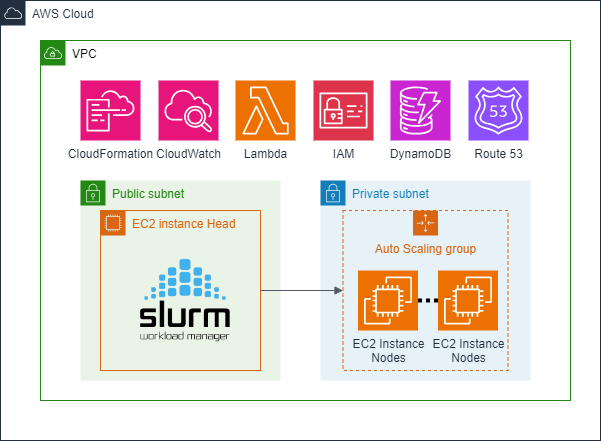
AWS ParallelCluster 제공 스케쥴러는 Slurm과 AWS Batch가 있으나 hands on 은 Slurm 환경으로 구성해 보도록 하겠습니다.
1. AWS ParallelCluster 사용을 위한 CLI 설치
AWS ParallelCluster를 시작 및 제거 등 관리를 하기위한 CLI를 설치합니다.
pip3 install aws-parallelcluster --upgrade --user

pcluster version
2. AWS ParallelCluster 설정파일 생성
AWS ParallelCluster 생성을 위해 yaml형태의 파일을 이용하여 템플릿을 이용해 ParallelCluster를 만들 수 있습니다, 다만 조금 더 편하게 작성할 수 있도록 대화형으로 지원하고 있습니다.
AWS ParallelCluster CLI를 통해 설정파일을 만들도록 하겠습니다.
pcluster configure --config slurm-config.yaml2-1. 생성 리전 선택
서울 리전 (ap-northeast-2)
2-2. 서버에 접속할 때 사용되는 Key 정보
AWS EC2에 생성된 KeyPair에서 선택합니다.
2-3. 스케쥴러 선택
Slurm과 AWS batch 중에서 선택할 수 있으나, Slurm으로 구성하도록 하겠습니다.
2-4. OS 설정
amazon linux, ubuntu, rhel, rocky 중에서 선택 가능하나, rhel, rocky의 경우 추가 비용 발생합니다.
각 OS 특징은 아래와 같습니다.
– Amazon Linux : AWS 최적화 OS
– Ubuntu : 커뮤니티를 가지고 있는 OS
– RHEL : 안정성이 높은 OS
– Rocky : RHEL과 비슷한 안정성
Hands-on 에서는 AWS 환경에서 구성하므로 Amazon Linux로 구성하도록 하겠습니다.
2-5. Head Node (마스터 노드) 유형 설정
관리 및 작업 스케쥴링의 역할로 큰 인스턴스가 필요하진 않습니다.
t3.medium 혹은 t3.large를 선택하여 생성합니다.
2-6. 대기 열 구성 설정 (Compute Fleet)
실질적인 수행을 하므로 워크로드에 따른 타입 및 개수 설정
c6i.large 혹은 m5.large 등 예상된 작업에 필요한 스펙을 지정해 줍니다.
2-7. 네트워크 설정
수동 설정을 통해 보안 강화, 관리최적화 환경을 구성하는 게 좋으나 hands-on 에서는 자동 생성을 통해 쉽게 생성하도록 하겠습니다.
Head Node, Compute Fleet 모두 퍼블릭 환경에 구성하도록 하겠습니다.
2-8. 결과 : slurm-config.yaml 파일이 생성되며 아래와 같은 내용으로 생성됩니다.
Region: ap-northeast-2

Image:

  Os: alinux2023

HeadNode:

  InstanceType: t3.medium

  Networking:

    SubnetId: subnet-123456789 # Public Subnet

    ElasticIp: true

  Ssh:

    KeyName: mykeypair

Scheduling:

  Scheduler: slurm

  SlurmQueues:

  - Name: queue1

    ComputeResources:

    - Name: m5large

      Instances:

      - InstanceType: m5.large

      MinCount: 0

      MaxCount: 10

    Networking:

      SubnetIds:

      - subnet-123456789 # Public Subnet
3. AWS Parallel Cluster 구축 및 접속
pcluster create-cluster 명령어를 통해 설정한 파일을 적용하여 AWS ParallelCluster를 생성합니다.
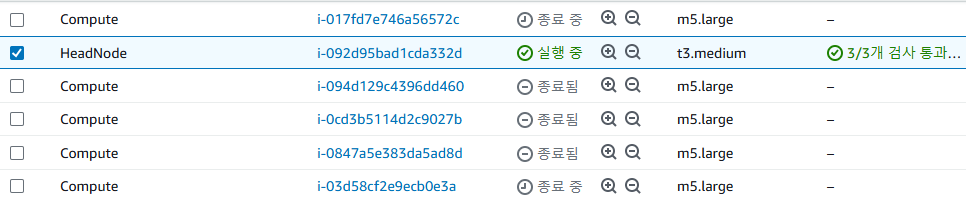
pcluster create-cluster --cluster-name my-cluster --cluster-configuration slurm-config.yaml해당 명령어를 통해 CloudFormation 스택이 생성되어 AWS Console을 통해서도 상태를 확인할 수 있습니다.
생성이 완료되면 SSH 접속하여 Head 노드에 접속합니다.
pcluster ssh --cluster-name my-cluster -i <key-pair 파일>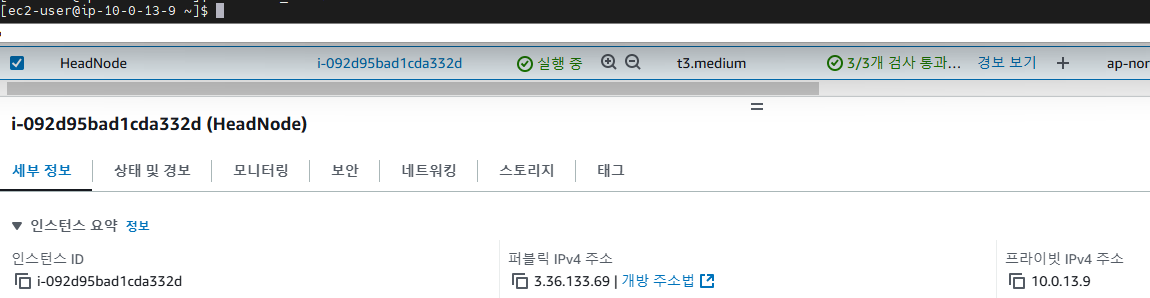
4. AWS ParallelCluster 작업 수행
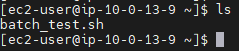
4-1. 수행을 위한 간단한 수행 파일 생성
30초 대기 후 한줄의 문장을 출력하는 batch_test.sh 작업 파일을 생성합니다.
===batch_test.sh===
#!/bin/bash
sleep 30
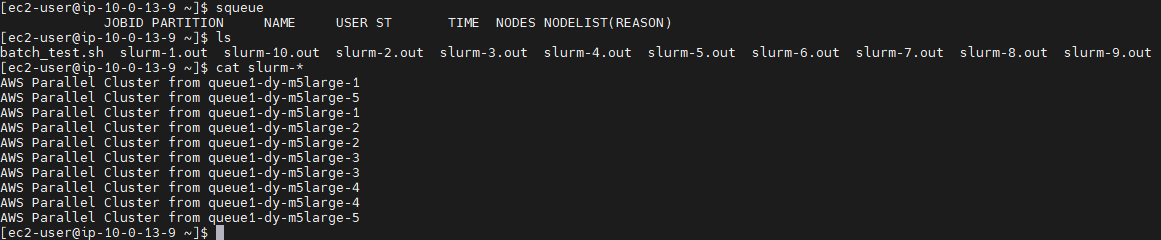
echo "AWS Parallel Cluster from $(hostname)"==========
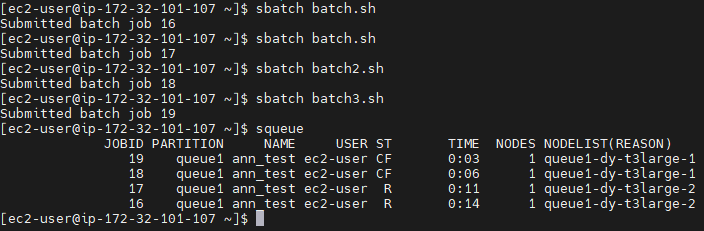
4-2. 큐 제출
생성한 작업을 수행합니다.
sbatch batch_test.sh
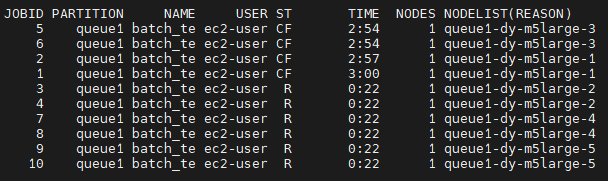
4-3. 상태 확인
작업이 잘 수행 중인지 확인합니다.
squeue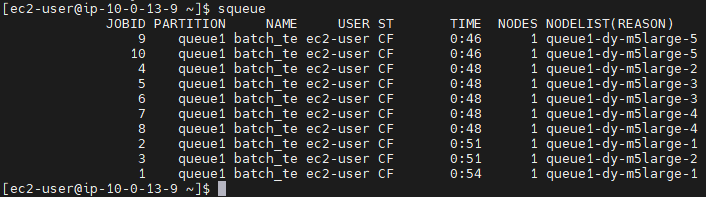

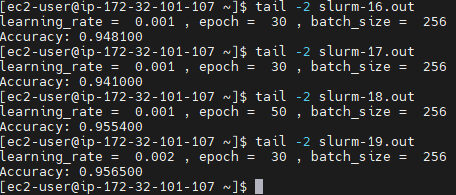
4-4. 결과 확인
생성된 파일을 확인하여 작업이 잘 수행되었는지 확인합니다.
5. 테스트 시연
위와 같이 AWS ParallelCluster 환경을 구성하면 머신러닝 모델을 학습 등 병렬처리에 특화된 작업을 수월하게 진행할 수도 있습니다.
아래 예시는 머신러닝 모델에 대해서 파라미터 별로 모델의 정확도를 확인해 볼 수 있는 예제입니다.
6. 리소스 제거
Head노드에서 빠져나와 생성하였던 AWS ParallelCluster를 제거합니다.
pcluster delete-cluster --region ap-northeast-2 --cluster-name my-cluster(VPC 자동 생성까지 하였다면 CloudFormation에서 VPC 관련 스택도 제거해 줍니다.)
본문에서는 간단하게 생성하였지만, 관리와 보안, 성능 등에 대해서 효율적으로 관리하기 위해서는 자세한 설정이 필요할 수 있습니다.
SA 박대성